
TL;DR
- A failed breakout drill should test the decision made before the next candle appears, not reward a lucky outcome.
- Write the level, confirmation rule, invalidation point, and no-trade condition before starting Bar Replay.
- Run 12 blind examples and classify each decision as valid, early, late, or skipped for a stated reason.
- Score rule use separately from the chart result. A sound decision can still lose, and a poor decision can still work once.
- Use the final score to choose one correction for the next practice session.
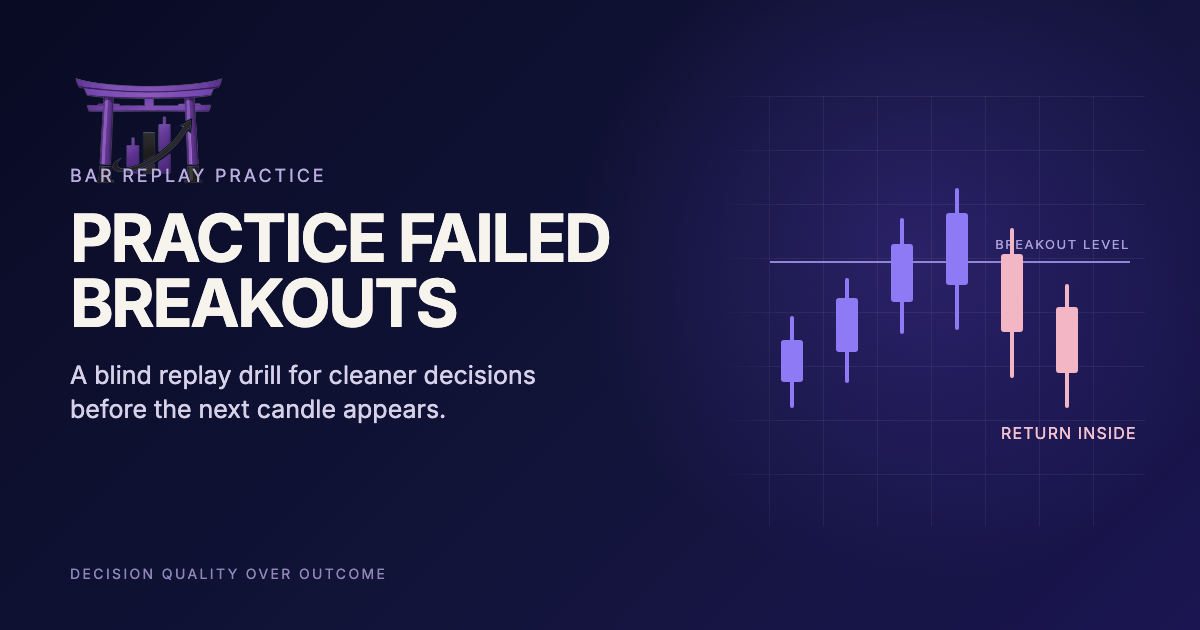
To practice failed breakouts with Bar Replay, you need a definition that can be applied before the chart reveals what happens next. A failed breakout usually means price moves through a level that mattered to your setup, then loses acceptance beyond that level. The exact confirmation can vary. Your practice rules cannot.
This guide turns that idea into a 12-chart exercise. It is educational practice, not a claim that failed breakouts predict a profitable trade. The point is to make your chart decision visible enough to review.
What a failed breakout drill should train
A static chart makes the reversal look obvious because the full move is already visible. Bar Replay removes that advantage. You can pause at the level, write a decision, then reveal one candle at a time. TradingView describes Bar Replay as a way to simulate past price movement for strategy testing and skill development.
The drill trains recognition under uncertainty. You are checking whether the level was defined in advance and whether the breakout met your written confirmation rule. You are also checking whether the return inside the prior range reached your invalidation point. Later price action does not get to rewrite those earlier facts.
Keep the exercise narrow. Do not try to prove a complete strategy with 12 charts. Hypothetical and simulated results have limits, a point reflected in the National Futures Association rules for presentations of hypothetical performance. Treat the session as decision practice rather than evidence of future returns.
If you are new to replay controls, start with the TradingView Bar Replay practice guide. For help defining swings and ranges before a breakout, use the market structure replay drill.
Set up a blind Bar Replay session
Choose historical sessions you have not recently studied. Hide future candles and remove any drawing that gives away the outcome. Pick one timeframe for the whole exercise. Changing timeframes after the result appears introduces a fresh rule that was not available when you made the decision.
Before pressing play, write four fields:
- The level: state the exact price or zone that must break.
- Confirmation: define what must happen beyond the level before the setup counts.
- Invalidation: state what would prove the breakout did not hold.
- No-trade condition: name the circumstance that requires a skip.
A confirmation rule might require a candle close beyond the range. An invalidation rule might require a close back inside it. Those are examples, not universal rules. Use definitions that match the setup you are studying, and keep them fixed for all 12 charts.
Do not place a simulated order yet. This first pass is classification practice. If you later add orders, read the SEC and FINRA explanations of stop and stop-limit orders first. A stop price is a trigger, and execution can differ from the trigger price in a fast market.
The 12-chart failed-breakout classification drill
Use one row per chart. Pause at the planned level, fill in the decision column, then reveal only enough bars to apply the written invalidation rule. The sequence below includes clean breaks and failed breaks. It also includes charts where the right answer is to wait.
| Chart | Decision window | Required entry | Score after reveal |
|---|---|---|---|
| 1 | First test of the level | Act, wait, or skip with one rule | 0 or 1 |
| 2 | Close beyond the level | Did confirmation occur? | 0 or 1 |
| 3 | Immediate return inside | Was invalidation applied? | 0 or 1 |
| 4 | Break with a wide candle | Did the no-trade rule apply? | 0 or 1 |
| 5 | Second test after rejection | Was the level kept unchanged? | 0 or 1 |
| 6 | Break during a quiet range | Was confirmation required? | 0 or 1 |
| 7 | Brief move beyond the level | Did you avoid early labeling? | 0 or 1 |
| 8 | Return inside, then retest | Was the original rule followed? | 0 or 1 |
| 9 | Late break near session end | Did the time filter require a skip? | 0 or 1 |
| 10 | Break against the chosen context | Was context recorded before reveal? | 0 or 1 |
| 11 | Clean break that holds | Did you avoid forcing a failure label? | 0 or 1 |
| 12 | Unclear level | Did uncertainty produce a skip? | 0 or 1 |
A passing session is 10 or more rule-following decisions out of 12. A score from 7 to 9 means repeat the same drill without changing the setup. Below 7 means the definition is probably too loose for useful practice. Rewrite the confirmation or invalidation rule before another run.
The thresholds are practice targets created for this exercise. They are not market statistics. Their job is to stop you from advancing while the decision rule is still inconsistent.
Worked example: a range break that returns inside
Assume a replay chart has traded between 100.00 and 101.20 for the visible session. You mark 101.20 before playback. Your confirmation rule is a five-minute close above 101.20. Your invalidation rule is a later five-minute close below 101.20. You also write a no-trade rule: skip if the confirming candle closes more than 0.60 above the level, because that would fall outside this drill's defined entry window.
The next candle closes at 101.32, so confirmation is present. The following candle closes at 101.14. The written invalidation has now occurred. Your classification is "failed breakout under the drill rule." You do not need the rest of the session to grade that decision.
Suppose price then rallies to 102.00. That later move does not turn the earlier classification into an error. The rule described a specific sequence and you applied it consistently. If the rule proves unhelpful across a larger, properly designed sample, revise it between sessions. Do not edit it midway through one chart.
Now change one detail. If the first candle had closed at 101.85, the no-trade rule would have required a skip. Calling it a failed breakout later would be hindsight. The practice result is the quality of the skip, not the move that followed.
Score the decision without rewarding hindsight
Give one point only when the action matches the rule written before the reveal. A chart can hold above the level and still earn a point if you correctly refused to label it a failure. A chart can reverse sharply and earn zero if you moved the level after seeing the reversal.
After all 12 charts, group mistakes by cause:
- Definition error: the level or rule was too vague to apply consistently.
- Execution error: the rule was clear, but you acted before it triggered.
- Review error: later candles changed how you described the earlier decision.
- Skip error: you acted even though the written no-trade condition was present.
Choose the most frequent cause for the next session. If early action appears four times, the next drill should pause one candle longer at every decision window. If the level keeps moving, freeze the drawing before playback and allow no edits. One correction makes the next result easier to interpret.
Record this result as a practice score, not a promise about live trading. Simulators cannot reproduce every fill or delay. They also cannot reproduce the emotional response to real money. They can still show whether you followed the decision rule you wrote.
FAQ
How many charts should I use to practice failed breakouts?
Start with 12 blind charts for this classification drill. That is enough to expose inconsistent definitions without pretending to estimate a strategy's real performance. Strategy testing requires a broader sample across market conditions and a documented method.
What counts as confirmation beyond a breakout level?
Use a rule you can observe before the next decision. A candle close beyond the level is one example. Time held beyond a level or a retest rule may also fit a defined setup. Keep the same rule for the full session.
Should I practice with simulated orders?
Begin with chart classification so order mechanics do not hide a weak definition. Add paper orders in a later pass if the platform supports the order types you plan to rehearse. Remember that stop orders and stop-limit orders behave differently.
How do I avoid hindsight bias in replay?
Use unfamiliar sessions and hide future candles. Write each rule before pressing play. Record the decision immediately. Do not move a level or change the timeframe after seeing the outcome.
Does a failed breakout mean price must reverse?
No. The label only describes what happened relative to your predefined level and invalidation rule. Price can return inside a range and later break out again. The drill grades rule use rather than a prediction.
Where ChartDojo fits
ChartDojo is chart practice with AI feedback, positioned between paper trading and live trading. Paper trading lets you place a simulated order. ChartDojo focuses on the reasoning behind the choice and gives AI-powered feedback on decision quality before real capital is involved.
Use the 12-chart drill to write your confirmation and invalidation logic, then bring the decision into a ChartDojo practice session for another layer of review. Follow-first practice keeps the focus on the next decision instead of a dramatic simulated result. Build real skills, not bad habits. Try the free trial and make one focused setup part of your daily practice cadence.